Five Tips for Excellent Portraits

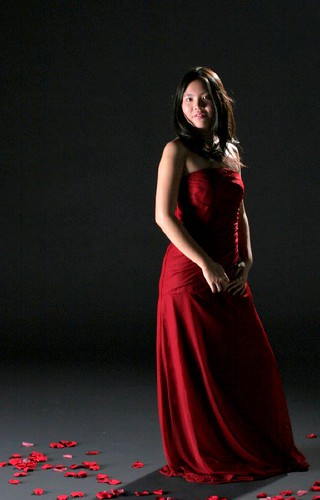
One – When shooting in a studio with a strobe light, shoot with a long lens (like a 70-200, towards the end of the focal length) in manual mode. Start at a shutter speed of 1/125, ISO at 100, and the aperture at f/11.0. Tweak slightly from there if necessary. When shooting in continuous light, use aperture priority mode at about f/11 with an ISO 400. Use a tripod, and auto focus using the subject’s eyes as the focus point.

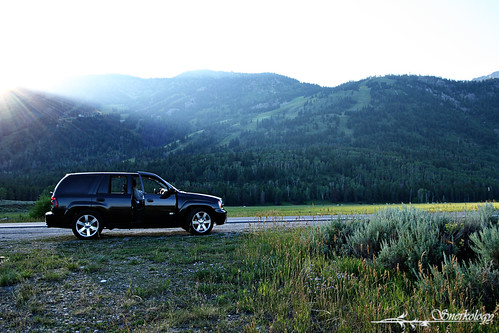
Two – When shooting portraits outdoors, start with the “sunny f/16” rule of thumb (ISO 200, shutter speed 1/200 to 1/250, aperture f/16). Prevent harsh shadows on the face by avoiding light that comes from directly overhead (like the sun). Find some shade and use a reflector to bounce light up into the face if necessary. You’ll be surprised at how well even the most indirect ambient light reflects.

Three – Take continuous shots. Put your camera in continuous shooting mode and shoot in short bursts to capture a series of shots, thereby increasing the likelihood that the shot will be in focus, composed correctly, the subject won’t be blinking, etc. This works especially well for children who have a hard time being still for extended periods of time.

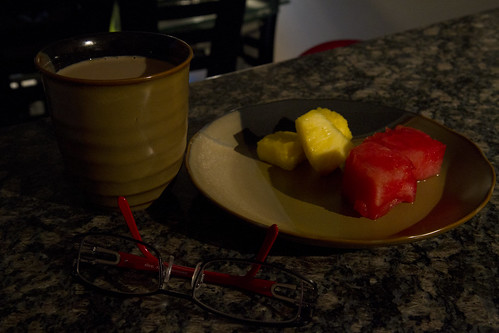
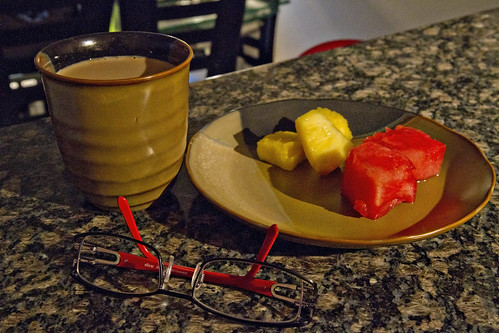
Four – If you are uncertain about the specific exposure settings required for your conditions, shoot in bracketed mode. In bracketed shooting mode, the camera will take a succession of shots with the first shot being the baseline point that the camera reads for correct exposure (or that you manually set). The second shot will stop down from that exposure point according to how you set it up (for example, bracketing with a half-stop, 3/4 of a stop, or a full stop) and the third shot will stop up from that baselined exposure point. In this manner you can capture three exposure samples and use the one that is the most successful. Use this in tandem with continuous shooting mode so that it won’t be necessary to press the shutter button three times in order to capture the three exposures.

Five – Shoot in aperture priority mode. Most often you will have a clear idea of the depth of field that you desire in your shot – a lower aperture number for more background blurring (or bokeh), and a higher aperture number to have more of the subject and background in focus. Shooting in aperture priority mode will allow the camera to choose the correct shutter speed for the lighting conditions.

Photo credit: Alex Dang on Flickr Creative Commons

How to Properly Clean a DSLR Camera Lens

In this video created by Nikon Help Hotline we will learn how to thoroughly clean your camera lenses. You probably won’t need to do this level of intensive cleaning all the time, most of the time a LensPen or microfiber cloth will do the job.

http://www.youtube.com/watch?v=G7S6VARidHk

What you will need:

  • 91% strength isopropyl rubbing alcohol
  • Giottos rocket blower
  • Microfiber cloth
  • Non–powdered rubber gloves
  • White synthetic brush

(via Lifehacker)


Photography Tips for a Road Trip

My husband waits patiently while I take a photo of the Grand Tetons.

A road trip is an ideal way to actually travel the miles between Point A and Point B. You have the opportunity to see and experience so much more about the country you live in, and the world you live in, when you’re driving it and not flying over it.

By its very nature, a road trip provides ample opportunities for photography. Out-the-window shots can be tricky because you’re moving and thereby creating a difficult environment from which to get a clear photograph. My recommendation is to roll down the window so you remove the risk of glare, have the driver slow down as much as is possible under the circumstances, and use a very fast lens and/or shutter speed to “stop” the motion (alternatively, if you’re actually going for a sense of motion, use a slower shutter speed). Keep the camera’s strap around your neck if you have to lean out, and don’t point the lens directly into the wind to protect it from dust (and bugs!). Make sure your lens is affixed with a UV filter and hood, to provide further protection.

When pulling off to the side of the road to get a shot, make sure you choose a safe spot, without any blind corners or turn-offs. Get well off the road to put some distance between you and the passing traffic. Always pay attention to your surroundings. Ideally, use lookout points or rest areas, or other sites purposefully built to provide the opportunity to pull off the road. Never stop on a bridge or a road too narrow for two cars to pass, and always face in the direction the traffic is traveling.

Keep your gear handy, not packed in the trunk or in the back seat. Things come up on you, and pass you by, at great speed when travelling by car. Use a telephoto lens (with Image Stabilization or Vibration Reduction) to pull in subjects that the road doesn’t take you directly toward. Make sure the windows are up and the air vents are pointed away from you whenever you change lenses, to minimize the amount of dust that gets into the inner workings of your camera. Practice changing lenses inside a pillow case (or even an old-school black bag), which is an excellent way to keep dust out of the camera.

One trick I’ve used on road trips is to lay the tripod across the back seat of the car, legs extended and ready to go. That way all I had to do was hop out of the stopped car, grab the tripod, snap the camera in place, and shoot. If you happen to have a second camera body just leave it attached to the tripod. Lay the whole assembly on a blanket on the back seat, and keep another camera in your lap for hand-held shots.

Happy road-tripping!

Recommended cameras:
Nikon D3100
Canon Rebel T3i
Pentax K-r

Recommended lenses:
Nikkor 18-35mm f/3.5-5.6
Tamoron 70-300mm f/4-5.6
Canon 135mm f/2.8

Photo credit: Tiffany Joyce

Low Light Photography Tips – Infographic

We’ve just finished our four part series on low light photography.  Low light photography is something that we all must deal with as photographers.  Whether you’re taking photos with a point and shoot during an evening out, shooting a wedding party or capturing a landscape at dusk it’s important to understand the basics of shooting with low light.  Photography is all about light, low light photography is no different and it offers new challenges and opportunities for creativity.

The first three parts in our series are:

Our fourth part is our low light infographic which we’re providing as a quick reference.  We thought beginners may want to print it out and keep it on them as they learn about low light shooting.  We have a few versions of it below so if you do print it click on for the biggest version.

Feel free to insert the full infographic on your blog for your readers benefit, just credit us back as the source using the code below.  Enjoy!

Embed the Mini Infographic (600 x 550)

<a href="http://snapsort.wpenginepowered.com/files/2011/04/Shooting-in-low-light-1000px.jpg"><img width="600" height="550" src="http://snapsort.wpenginepowered.com/files/2011/04/Shooting-in-low-light-mini.jpg" title="Low Light Photography Infographic" alt="low light photography"/></a><br /> <a href="http://snapsort.com">Snapsort's</a> <a href="http://blog.snapsort.com/2011/04/05/low-light-photograph/">Low Light Photography</a> Infographic

Embed the Mini Infographic (600 x 1900)
<a href="http://snapsort.wpenginepowered.com/files/2011/04/Shooting-in-low-light-1000px.jpg"><img width="600" height="1900" src="http://snapsort.wpenginepowered.com/files/2011/04/Shooting-in-low-light-600px.jpg" title="Low Light Photography Infographic" alt="low light photography"/></a><br /> <a href="http://snapsort.com">Snapsort's</a> <a href="http://blog.snapsort.com/2011/04/05/low-light-photograph/">Low Light Photography</a> Infographic

Embed the Mini Infographic (800 x 2533)
<a href="http://snapsort.wpenginepowered.com/files/2011/04/Shooting-in-low-light-1000px.jpg"><img width="800" height="2533" src="http://snapsort.wpenginepowered.com/files/2011/04/Shooting-in-low-light-800px.jpg" title="Low Light Photography Infographic" alt="low light photography"/></a><br /> <a href="http://snapsort.com">Snapsort's</a> <a href="http://blog.snapsort.com/2011/04/05/low-light-photograph/">Low Light Photography</a> Infographic

Fixing Underexposed Photos in Camera Raw

Taking photos in low light takes some practise to perfect, we have put together a great guide to help you master the art of low light photograph. Tips for taking low lights shotslow light cameras and equipment, and even a infographic on low light photography tips to bring it all together. We hope you enjoy.

Underexposed photographs can be salvaged using post-processing software. If you’re shooting in RAW format, even more post-processing capabilities are available to you. Sometimes it’s beneficial to purposefully underexpose a shot, especially if you’re shooting hand-held in dim lighting situations. It’s better to get a shot that’s a bit underexposed but salvageable, rather than a properly exposed but blurry photograph.

For the purposes of this discussion, I will be editing a photo using Adobe Bridge, Camera Raw 6.3 and Photoshop CS5. However, many of the features and basic steps are applicable in other programs.

First, here is the (purposefully) underexposed shot, a still life of my morning:

This photo was shot in RAW format, so when it is opened from Adobe Bridge, it brings up the Camera Raw (6.3) panel:

Click for larger image

The first thing I usually do is click on “Auto” to see what settings Camera Raw would recommend for this photograph:

Click for larger image

As you can see, the “Auto” settings may not be appropriate for this shot. The increased exposure and brightness blew out portions of the image. To undo the automated settings, simply click on “Default” to bring the settings back to where they originally were. Now play with the various sliders, primarily “Exposure”, “Recovery”, “Fill Light”, “Blacks”, “Brightness”, and “Contrast” to achieve the desired appearance. As each slider is moved, a preview of the changes can be seen.

Click for larger image

Once the desired appearance is achieved, click on “Open Image” to open the image in Photoshop. If no more adjustments are needed, save the file as a JPEG. In this case, some noise reduction and sharpening was in order. Here is the final image:

Quite a difference from the original, and the adjustments only took me approximately two minutes!

In a future article we will discuss fixing JPEG photos using adjustment layers in Photoshop.

Photo credits: Tiffany Joyce