The Essence of Great Portraits

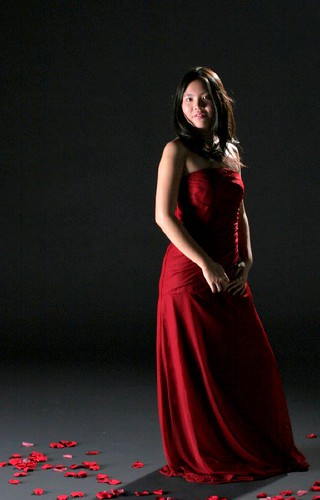
sample portrait
A very decent head and shoulders portrait that may be the most unimaginative work I've ever produced

You all probably remember the series we did on studio lighting a while ago. While we were focused on the technical aspects of lighting a good portrait, it completely overlooks the art. Sure, what we came away with was a completely decent head and shoulders portrait.  Looking at it now I realize it lacks any imagination and creativity.

Okay, that’s not totally fair. I shot those photos to demonstrate how changes in lighting change the look of a portrait, not as a demonstration in portrait photography. And yet it still bothers me. The reason it bothers me is that many photographers would think that’s a perfectly fine portrait.

You can have the camera, the lens, and the lighting and take fantastically lit portraits that are technically near perfect,  and still produce average work lacking in imagination and creativity.

The Essence Of a Great Portrait

The essence of a great portrait doesn’t come from the lighting or the camera, it comes from getting to know the person and capturing the essential qualities that make them unique. I don’t think the best portraits always come in a studio setting, they come taking the shots at home, in the shop, or where they work. Maybe that’s my background as a photojournalist talking, but those are the places people are most relaxed and most likely to be themselves.

If you are going to work in a studio, which does offer a lot of advantages, have the person bring something unique to them. For someone like my sister in law, I’d have her bring her knitting bag. I have a friend in Seattle, for her it would be one of her bikes and one of her cats. How you work such bizarrely different props into a single picture, that’s what you get the big bucks to figure out.

The bottom line is anyone who thinks they can capture a person just by having them sit on a stool or stand in front of a background is doing them a disservice. Spend some time getting to know your subjects and figure out what makes them unique.

Good portraits show people on the outside, great portraits show people on the inside.

Five Tips for Excellent Portraits

One – When shooting in a studio with a strobe light, shoot with a long lens (like a 70-200, towards the end of the focal length) in manual mode. Start at a shutter speed of 1/125, ISO at 100, and the aperture at f/11.0. Tweak slightly from there if necessary. When shooting in continuous light, use aperture priority mode at about f/11 with an ISO 400. Use a tripod, and auto focus using the subject’s eyes as the focus point.

Two – When shooting portraits outdoors, start with the “sunny f/16” rule of thumb (ISO 200, shutter speed 1/200 to 1/250, aperture f/16). Prevent harsh shadows on the face by avoiding light that comes from directly overhead (like the sun). Find some shade and use a reflector to bounce light up into the face if necessary. You’ll be surprised at how well even the most indirect ambient light reflects.

Three – Take continuous shots. Put your camera in continuous shooting mode and shoot in short bursts to capture a series of shots, thereby increasing the likelihood that the shot will be in focus, composed correctly, the subject won’t be blinking, etc. This works especially well for children who have a hard time being still for extended periods of time.

Four – If you are uncertain about the specific exposure settings required for your conditions, shoot in bracketed mode. In bracketed shooting mode, the camera will take a succession of shots with the first shot being the baseline point that the camera reads for correct exposure (or that you manually set). The second shot will stop down from that exposure point according to how you set it up (for example, bracketing with a half-stop, 3/4 of a stop, or a full stop) and the third shot will stop up from that baselined exposure point. In this manner you can capture three exposure samples and use the one that is the most successful. Use this in tandem with continuous shooting mode so that it won’t be necessary to press the shutter button three times in order to capture the three exposures.

Five – Shoot in aperture priority mode. Most often you will have a clear idea of the depth of field that you desire in your shot – a lower aperture number for more background blurring (or bokeh), and a higher aperture number to have more of the subject and background in focus. Shooting in aperture priority mode will allow the camera to choose the correct shutter speed for the lighting conditions.

Photo credit: Alex Dang on Flickr Creative Commons