Weekend Project – Light Painting

light painting example
Light painting is a great weekend project with the kids - photo by Arcade

Light painting is one of those things you save for a Saturday night with the kids.  It’s fun, easy, you’ll get results you never expected, and the kids will have a blast.  All you need is a dark area, a stout tripod, remote release, and an assortment of lights, glow sticks, and flashlights.

One safety rule: Leave the laser pointers at home.  Laser light and your camera sensor do not mix and permanent damage can result.  Some people do use lasers to “write” on a solid surface and that’s fine, just understand a beam of coherent light coming directly in the lens and your camera is a very expensive paperweight.

This is where you’ll get familiar with your camera’s “B” or Bulb setting.  Bulb means you open the shutter and it will stay open as long as you’ve got your finger on the trigger.

There are two basic styles to light painting: You can attempt to draw things in the air with your lights, or you can attempt a design or abstract shape.  When you’re done with the design part, then you can decide whether you want to fire a flash unit and illuminate the rest of the area, sometimes including the artist, or not.

For abstract shapes, one of my favorite tricks is to tie a glow stick on a piece of string and swing it around with the shutter open.  This is your chance to go crazy.  Try different colors, different patterns, use your lights to make outline of solid objects.  You’re only limited by time and your imagination.

Just remember, in the summer, be sure and take some bug spray with you.  You’ll need it.

Top 10 Iconic Kisses of all time

After the Vancouver Canucks lost the Stanley Cup this week, a riot broke out. From that riot came an iconic photo taken by Rick Lam of Scott Jones and Alexandra Thomas. After Thomas was knocked down and was crying on the ground, her boyfriend stooped down to help and comfort her with a kiss. Rick didn’t even know he had captured the couple kissing until a co-worker congratulated him on the great photo. In the spirit of this great photo we have put together a list of the most iconic kisses of all time.

10: The Vancouver Riot Kiss

Rich Lam / Getty Images


9: A 1968 episode of Star Trek entitled “Plato’s Stepchildren” featured the first kiss between an African-American and a Caucasian on American television.

Captain Kirk kissing Lt. Uhura

8: This internationally acclaimed photo taken by Tanya Chalkin has become a best-selling poster.

Tanya Chalkin's The Kiss

7: Spider-Man, played by Tobey Maguire, kisses Mary Jane (Kirsten Dunst) in the first Spider-Man movie.

Spider-Man, played by Tobey Maguire, kisses Mary Jane (Kirsten Dunst)

6: Adrien Brody kissed Halle Berry after winning the 2002 Academy Award for Best Actor.

Adrien Brody kisses Halle Berry after

5: The kiss that woke Princess Aurora in the 1959 Walt Disney film “Sleeping Beauty”.

Prince Philip kissing Princess Aurora to wake her

4: At the 2003 MTV Video Music Awards Madonna smooched with both Britney Spears and Christina Aguilera after the opening performance of ‘Like a Vigin’ and ‘Hollywood’

Madonna kissing Britney Spears

3: The kiss from the 1939 film “Gone with the Wind” starring Clark Gable and Vivien Leigh.

Rhett Butler (Clark Gable) & Scarlett O'Hara (Vivian Leigh)

2: After the royal wedding in 1981 Prince Charles and Princess Diana kissed on the balcony of Buckingham Palace.

Prince Charles and Princess Diana kissing on the balcony of Buckingham Palace

1: A photo by Alfred Eisenstaedt that showed an American sailor kissing a young nurse on V-J Day in Time Square on August 14, 1945.

V-J Day kiss in Times Square


Fixing Underexposed Photos in Camera Raw

Taking photos in low light takes some practise to perfect, we have put together a great guide to help you master the art of low light photograph. Tips for taking low lights shotslow light cameras and equipment, and even a infographic on low light photography tips to bring it all together. We hope you enjoy.

Underexposed photographs can be salvaged using post-processing software. If you’re shooting in RAW format, even more post-processing capabilities are available to you. Sometimes it’s beneficial to purposefully underexpose a shot, especially if you’re shooting hand-held in dim lighting situations. It’s better to get a shot that’s a bit underexposed but salvageable, rather than a properly exposed but blurry photograph.

For the purposes of this discussion, I will be editing a photo using Adobe Bridge, Camera Raw 6.3 and Photoshop CS5. However, many of the features and basic steps are applicable in other programs.

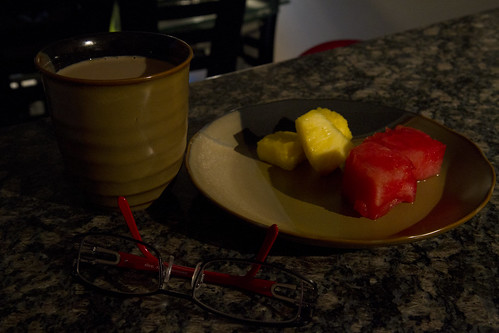
First, here is the (purposefully) underexposed shot, a still life of my morning:

This photo was shot in RAW format, so when it is opened from Adobe Bridge, it brings up the Camera Raw (6.3) panel:

Click for larger image

The first thing I usually do is click on “Auto” to see what settings Camera Raw would recommend for this photograph:

Click for larger image

As you can see, the “Auto” settings may not be appropriate for this shot. The increased exposure and brightness blew out portions of the image. To undo the automated settings, simply click on “Default” to bring the settings back to where they originally were. Now play with the various sliders, primarily “Exposure”, “Recovery”, “Fill Light”, “Blacks”, “Brightness”, and “Contrast” to achieve the desired appearance. As each slider is moved, a preview of the changes can be seen.

Click for larger image

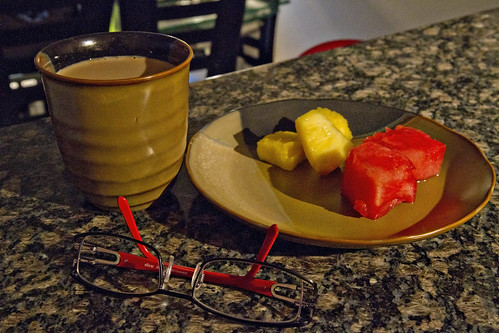
Once the desired appearance is achieved, click on “Open Image” to open the image in Photoshop. If no more adjustments are needed, save the file as a JPEG. In this case, some noise reduction and sharpening was in order. Here is the final image:

Quite a difference from the original, and the adjustments only took me approximately two minutes!

In a future article we will discuss fixing JPEG photos using adjustment layers in Photoshop.

Photo credits: Tiffany Joyce

Tips for Photographing in Low Light

Taking photos in low light takes some practise to perfect, we have put together a great guide to help you master the art of low light photograph. Low light cameras and equipmentfixing underexposed photos and even a infographic on low light photography tips to bring it all together. We hope you enjoy.

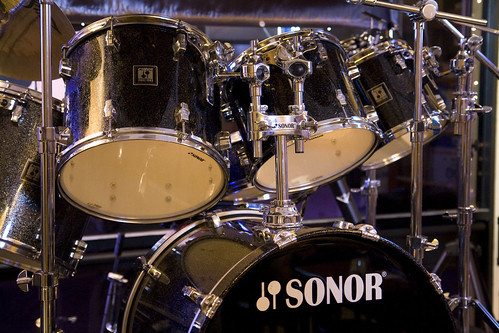
Drums, shot at 1/6 of a second using f/2.8, ISO 1600

Sometimes we want to take photographs under low lighting conditions without using a flash. It could be that we don’t want to cause a distraction during a ceremony or formal event. Perhaps flash isn’t allowed, such as during many concerts or performances. Or maybe we just like the ambiance that the use of the available light creates. Whatever the reason, it is reassuring to know that we can take quality photographs, even in dim lighting, without the use of a flash.

One – Crank up the ISO. The higher the ISO number, the more sensitive the camera’s sensor is to the light that is reaching it. My Canon 7D’s highest ISO is 6400 (I haven’t purchased the expansion), and I’ve used that setting to photograph bands at night clubs with some pretty good results. The additional noise that is generated by using a high ISO can be filtered out somewhat in post-processing. Sometimes the extra grain adds a little something special to the shot. Shooting in RAW format allows for the most flexibility in post-processing.

Two – Use a larger aperture. The larger the aperture, the more light is entering the lens. Shooting at f/5.6 lets in more light than shooting at f/18 (remember, the lower the number, the larger the aperture).

Three – Slow down the shutter speed. More light is captured the longer the shutter remains open. Keep in mind that a good “rule of thumb” for clear hand-held shots is no slower than 1/60th of a second. Use a tripod if you’re shooting at anything slower than that, though I have had success at slower hand-held shots using lenses with image stabilization.

Four – If you do have to use a flash, try to avoid the on-camera pop-up. It tends to flatten the appearance of the image because the light is hitting the subject directly. Invest in an off-camera flash, angle light so that it is not directly in front of the subject, and use reflective surfaces and diffusers to soften the light. Strategically placed constant light (such as tungsten lamps using soft white bulbs) work excellently for providing additional ambient light without sacrificing the atmosphere of the setting.

Five – Use your camera’s exposure compensation capabilities. The scale on many of today’s DSLR’s allow from -3 to +3 stops in 1/3 stop increments (my 7D is +/-5). Dial the exposure compensation to the positive side to purposefully “overexpose” the photograph.

Photo credit: Tiffany Joyce

Vivian Maier: an amazing unknown street photographer

Vivian Maier, a Chicago nanny who took more than 100,000 photos during her lifetime but never showed them to anyone. Somehow her photos found their way into the hands of local historian John Maloof in 2007, John knew she had talent but unfortunately she died before her genius could be shared with the world. Her photos have been exhibited around the world and some say she may rank among the top street photographers of the 20th century.