Travel Photography

Our rented Harley Street Glide in front of the Grand Tetons.

One of the primary reasons that people practice photography is to record their travel experiences. Once-in-a-lifetime opportunities can be memorialized forever, which actually generates a form of anxiety within the photographer. “I’ll only be here for a brief time, how can I guarantee that my photos turn out well? What if my camera gets stolen, or what if my memory card gets lost or accidentally erased? What gear should I take with me to cover the range of circumstances that I might encounter?” This article is going to help you answer some of those questions and relieve some of that anxiety.

There are some tricks you can use that won’t necessarily guarantee that you’ll get “the” shot, but will certainly improve your odds. First, don’t be afraid to use your camera’s automated settings – primarily “P” or “Program Mode”. This comes in especially handy if you are moving through various light levels and shooting various subject matter, moving from indoors to outdoors and back in again, if you’re in a vehicle, or if you simply don’t have the opportunity to slow down and determine the aperture and shutter speed that each shot would require. Just use a higher ISO, such as 800, which will accommodate any light level you might encounter. It won’t be a perfect ISO for every circumstance, but it won’t be too terribly high for outdoor shots, and will come in handy for dimmer lighting situations. Also, shoot in burst or continuous shooting mode. This will increase the likelihood that the shot you want is focussed and framed appropriately. Finally, shoot in RAW format so that you can improve sharpness, composition, white balance and exposure in post-processing should it be necessary. Recommended Cameras: Canon EOS 7D, Pentax K-5, Nikon D300S, Sony Alpha A580.

Next is to consider a lens that has all of the focal range and flexibility you may need for a multitude of situations, is light enough to carry around all day, and is fast enough to accommodate low light levels. Such a lens is tough to find, but you certainly don’t want to be lugging multiple lenses around, especially if you’re on foot! Choose a lens with image stabilization so that you are more successful getting hand-held shots (who wants to lug around a tripod or monopod all day?). Consider these recommended lenses: Sigma 18-250m f/3.5-6.3 (available for both Canon and Nikon), Canon EF 70-300mm DO IS USM (or the Nikon equivalent), Canon EF-S 17-55mm f/2.8 IS (or the Nikon equivalent).

In the spirit of keeping the weight down, consider leaving the battery grip at home and just carry a couple of spare batteries charged up and ready to go. Don’t skimp on the memory cards – put two or three 16 or 32 GB memory cards in your pocket. Some folks I know even leave off the lens hood and UV filter, trying to get the camera as light and manageable as possible. Don’t bother with an external flash unless you know you’re really going to need one. Really, the less obtrusive your camera appears, the less likely it is to draw the wrong kind of attention (like would-be thieves). Consider even getting a generic camera strap instead of the one that came with the camera, emblazoned with the brand and model.

Finally, consider traveling with your laptop and an external hard drive. Yes, this adds bulk to your traveling gear, but it also adds peace of mind. If you have the ability to off-load photos from the memory cards onto the computer hard drive or external drive, you can feel much more comfortable about the safety of the photos. It also helps to upload to photo sharing sites such as Flickr throughout your travels – dedicate an hour or so each night while hanging out in your hotel room to uploading your photos to a site, which will further protect them from loss.

Hopefully some of these tips will help you during your next trip. Happy travels!

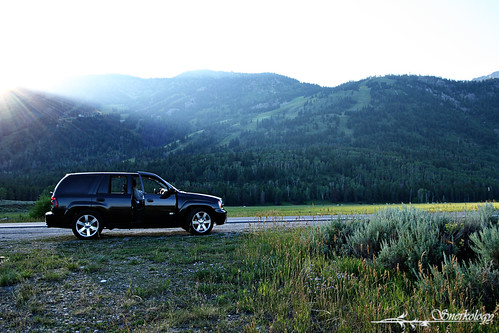
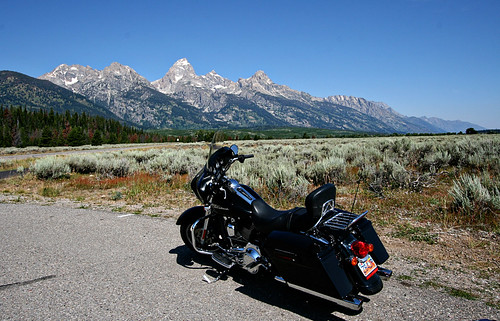
Photo Credit: Tiffany Joyce

Five Tips for Excellent Portraits

One – When shooting in a studio with a strobe light, shoot with a long lens (like a 70-200, towards the end of the focal length) in manual mode. Start at a shutter speed of 1/125, ISO at 100, and the aperture at f/11.0. Tweak slightly from there if necessary. When shooting in continuous light, use aperture priority mode at about f/11 with an ISO 400. Use a tripod, and auto focus using the subject’s eyes as the focus point.

Two – When shooting portraits outdoors, start with the “sunny f/16” rule of thumb (ISO 200, shutter speed 1/200 to 1/250, aperture f/16). Prevent harsh shadows on the face by avoiding light that comes from directly overhead (like the sun). Find some shade and use a reflector to bounce light up into the face if necessary. You’ll be surprised at how well even the most indirect ambient light reflects.

Three – Take continuous shots. Put your camera in continuous shooting mode and shoot in short bursts to capture a series of shots, thereby increasing the likelihood that the shot will be in focus, composed correctly, the subject won’t be blinking, etc. This works especially well for children who have a hard time being still for extended periods of time.

Four – If you are uncertain about the specific exposure settings required for your conditions, shoot in bracketed mode. In bracketed shooting mode, the camera will take a succession of shots with the first shot being the baseline point that the camera reads for correct exposure (or that you manually set). The second shot will stop down from that exposure point according to how you set it up (for example, bracketing with a half-stop, 3/4 of a stop, or a full stop) and the third shot will stop up from that baselined exposure point. In this manner you can capture three exposure samples and use the one that is the most successful. Use this in tandem with continuous shooting mode so that it won’t be necessary to press the shutter button three times in order to capture the three exposures.

Five – Shoot in aperture priority mode. Most often you will have a clear idea of the depth of field that you desire in your shot – a lower aperture number for more background blurring (or bokeh), and a higher aperture number to have more of the subject and background in focus. Shooting in aperture priority mode will allow the camera to choose the correct shutter speed for the lighting conditions.

Photo credit: Alex Dang on Flickr Creative Commons

Photography Tips for a Road Trip

My husband waits patiently while I take a photo of the Grand Tetons.

A road trip is an ideal way to actually travel the miles between Point A and Point B. You have the opportunity to see and experience so much more about the country you live in, and the world you live in, when you’re driving it and not flying over it.

By its very nature, a road trip provides ample opportunities for photography. Out-the-window shots can be tricky because you’re moving and thereby creating a difficult environment from which to get a clear photograph. My recommendation is to roll down the window so you remove the risk of glare, have the driver slow down as much as is possible under the circumstances, and use a very fast lens and/or shutter speed to “stop” the motion (alternatively, if you’re actually going for a sense of motion, use a slower shutter speed). Keep the camera’s strap around your neck if you have to lean out, and don’t point the lens directly into the wind to protect it from dust (and bugs!). Make sure your lens is affixed with a UV filter and hood, to provide further protection.

When pulling off to the side of the road to get a shot, make sure you choose a safe spot, without any blind corners or turn-offs. Get well off the road to put some distance between you and the passing traffic. Always pay attention to your surroundings. Ideally, use lookout points or rest areas, or other sites purposefully built to provide the opportunity to pull off the road. Never stop on a bridge or a road too narrow for two cars to pass, and always face in the direction the traffic is traveling.

Keep your gear handy, not packed in the trunk or in the back seat. Things come up on you, and pass you by, at great speed when travelling by car. Use a telephoto lens (with Image Stabilization or Vibration Reduction) to pull in subjects that the road doesn’t take you directly toward. Make sure the windows are up and the air vents are pointed away from you whenever you change lenses, to minimize the amount of dust that gets into the inner workings of your camera. Practice changing lenses inside a pillow case (or even an old-school black bag), which is an excellent way to keep dust out of the camera.

One trick I’ve used on road trips is to lay the tripod across the back seat of the car, legs extended and ready to go. That way all I had to do was hop out of the stopped car, grab the tripod, snap the camera in place, and shoot. If you happen to have a second camera body just leave it attached to the tripod. Lay the whole assembly on a blanket on the back seat, and keep another camera in your lap for hand-held shots.

Happy road-tripping!

Recommended cameras:
Nikon D3100
Canon Rebel T3i
Pentax K-r

Recommended lenses:
Nikkor 18-35mm f/3.5-5.6
Tamoron 70-300mm f/4-5.6
Canon 135mm f/2.8

Photo credit: Tiffany Joyce

Equipment for Low Light Photography

Taking photos in low light takes some practise to perfect, we have put together a great guide to help you master the art of low light photograph. Tips for taking low lights shots, fixing underexposed photos and even a infographic on low light photography tips to bring it all together. We hope you enjoy.
Citrus shot with a Canon Digital Rebel XTi using a 50mm f/1.4 lens.  1/100, f/2.0, 50mm, ISO 1600.
Citrus shot with a Canon Digital Rebel XTi using a 50mm f/1.4 lens. 1/100, f/2.0, 50mm, ISO 1600.

Make the most of this list of recommended photography equipment for successful shooting under low lighting conditions.

Camera – The best DSLR cameras for low light photography posses a high maximum ISO, burst shooting capabilities, exposure compensation capabilities, RAW file format capabilities, and multi-point auto-focus. The Nikon D7000 is an excellent choice, as is the Canon 5D Mark II and the Pentax K-5. For more entry-level photography, choose a Sony Alpha A580 or a Canon Rebel T3i.

Lens – A lens is considered “fast”, or most capable in low-light photography, if it has a very low maximum aperture. Anything below f/2.8 is fantastic for photography in dim settings. Also, look for a lens that has image stabilization or vibration reduction capabilities. Many Canon fans swear by the 35mm f/1.4L or the 50mm f/1.4 prime lenses. The Canon EF-S 17-55 f/2.8 IS is a great walking-around zoom lens with image stabilization capabilities. For Nikon enthusiasts, the equivalent prime lenses are the (expensive!) Nikkor AF-S 35mm f/1.4G and the Nikkor AF-S 50mm f/1.4G. For a great walking-around zoom lens, choose the Nikkor 17-55mm f/2.8G.

Tripod or Monopod – Choose a quality, sturdy tripod with a ball head and quick release to provide excellent support and flexibility for low light photography. Grab a monopod for functional stability while on the go. Personally, I am a big believer in Manfrotto products.

Remote Shutter Release – Use a remote shutter release with a tripod-mounted camera to eliminate any potential for camera shake while photographing.

External Flash – Speedlites are all the rage for providing off-camera flash that is flexible and portable. Canon’s lineup of Speedlite flashes offer a range of functionality and affordability. Nikon has their own lineup of speedlights as well.

Reflectors – Reflectors work great for capturing and directing even the smallest amount of ambient light. Choose a reflector that is silver on one side and gold on the other in order to provide cooler or warmer light quality. Lastolite has a great lineup of quality products at affordable prices.

Tips for Photographing in Low Light

Taking photos in low light takes some practise to perfect, we have put together a great guide to help you master the art of low light photograph. Low light cameras and equipmentfixing underexposed photos and even a infographic on low light photography tips to bring it all together. We hope you enjoy.

Drums, shot at 1/6 of a second using f/2.8, ISO 1600

Sometimes we want to take photographs under low lighting conditions without using a flash. It could be that we don’t want to cause a distraction during a ceremony or formal event. Perhaps flash isn’t allowed, such as during many concerts or performances. Or maybe we just like the ambiance that the use of the available light creates. Whatever the reason, it is reassuring to know that we can take quality photographs, even in dim lighting, without the use of a flash.

One – Crank up the ISO. The higher the ISO number, the more sensitive the camera’s sensor is to the light that is reaching it. My Canon 7D’s highest ISO is 6400 (I haven’t purchased the expansion), and I’ve used that setting to photograph bands at night clubs with some pretty good results. The additional noise that is generated by using a high ISO can be filtered out somewhat in post-processing. Sometimes the extra grain adds a little something special to the shot. Shooting in RAW format allows for the most flexibility in post-processing.

Two – Use a larger aperture. The larger the aperture, the more light is entering the lens. Shooting at f/5.6 lets in more light than shooting at f/18 (remember, the lower the number, the larger the aperture).

Three – Slow down the shutter speed. More light is captured the longer the shutter remains open. Keep in mind that a good “rule of thumb” for clear hand-held shots is no slower than 1/60th of a second. Use a tripod if you’re shooting at anything slower than that, though I have had success at slower hand-held shots using lenses with image stabilization.

Four – If you do have to use a flash, try to avoid the on-camera pop-up. It tends to flatten the appearance of the image because the light is hitting the subject directly. Invest in an off-camera flash, angle light so that it is not directly in front of the subject, and use reflective surfaces and diffusers to soften the light. Strategically placed constant light (such as tungsten lamps using soft white bulbs) work excellently for providing additional ambient light without sacrificing the atmosphere of the setting.

Five – Use your camera’s exposure compensation capabilities. The scale on many of today’s DSLR’s allow from -3 to +3 stops in 1/3 stop increments (my 7D is +/-5). Dial the exposure compensation to the positive side to purposefully “overexpose” the photograph.

Photo credit: Tiffany Joyce